The Perfect Homemade Hot Chocolate

It hasn’t actually got that cold yet. Correct me if I’m wrong, but isn’t it meant to be a lot chillier by now? I haven’t got my big scarfs out. I’m in no need of gloves and I haven’t even swung my full coat collection into action. My real, big, winter coats are still safely in storage and I haven’t come anywhere near close to pulling them out yet.

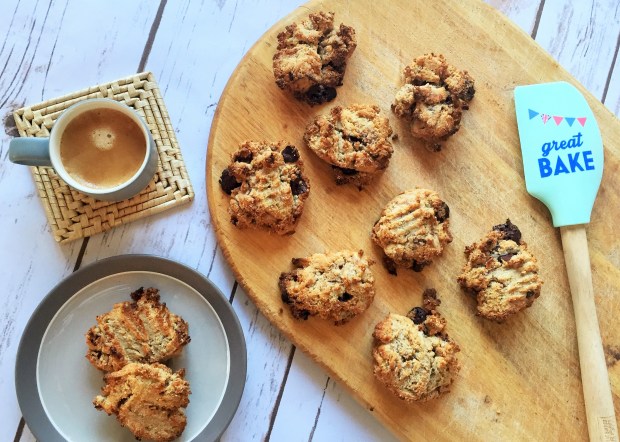
That said, it is getting much, much darker (sob) and so cosying up in the evenings is still entirely necessary. Warm drinks are essential for this. I’m being slightly contradictory here though, as I’m not much a warm-drinks-drinker. I don’t like coffee and I’d say I am a ‘social tea drinker’ – I will if you will, but never on my own. So standing in line at a coffee shop with my coffee-obsessed boyfriend the other day, I had my usual tussle over what I wanted (the real answer – nothing). Then I noticed they had hot chocolate…

IMG_7858 (2)IMG_7862 (2)

I’m finding myself craving hot chocolate more and more these days. I love chocolate (who doesn’t…) – I’d happily give up sweets, crisps, cake etc etc but I could never let go of chocolate. So hot chocolates feel like the ultimate treat, especially as the days are getting darker (if not colder).

It turns out that making your own is ridiculously easy and it tastes so much better. Yes, stirring powder into hot milk is hardly strenuous in the first place, but just put in a little extra effort and it’s entirely worth it. Melted chocolate is better than powder any day.

I got the original recipe from here, but really you can add or take away anything you want (that’s part of the fun!) and the measurements don’t need to be precise. And the method is essentially chuck it in a saucepan and stir.

You will need – 100g of your favourite chocolate (I mixed milk and dark), 2 cups of water, 2 cups of milk and 2 cinnamon sticks. Put everything but the milk in the saucepan. When the chocolate has entirely melted, add the milk and keep stirring until it’s warm and ready to drink (this takes a little longer than you’d expect). Add whipped cream, cocoa powder, marshmallows, an extra cinnamon stick and whatever else takes your fancy and enjoy! Easy.

Halloween Chocolate Bark

If pumpkin picking is one way to do Halloween without the scares, then getting creative in the kitchen is the other. And baking is always more fun when you have a theme to follow.

This Halloween chocolate bark is unbelievably simple. It requires absolutely minimal skill, effort, ingredients, equipment and time. I really mean it. You could make this bark now and it will be ready for tonight’s scary movie session.

You just need a lot of chocolate and as many toppings as you wish. I went a bit crazy in the Halloween aisle of Waitrose and ended up with skeleton faces, tiny bats, chocolate stars (big and small), mini ghouls, crunchy bronze glitter and fudge chunks amongst other things. But the choices are endless, and you don’t need as many decorations as I have. I also used milk, dark and white chocolate (because why not?) but again, do whatever you prefer. I would recommend at least two chocolates though, as the bark will look prettier and the combinations taste great.

p1040218-2picture2

Simply melt the chocolate in separate bowls. Line a baking tray with parchment and pour your base chocolate onto it. Spread out using a spoon into a neat rectangle. If you are using a second chocolate, drizzle over the top. Don’t spread the second layer as the chocolates will mix together into one big mess.

Then decorate! Go crazy and put as much as you want on top, the spookier the  better. You can also drizzle leftover melted chocolate on top, which is what I did with one of my slabs.

Then put in the fridge/freezer (depending on how imminent the scary movie session is) until the slabs have completely hardened. Remove and break into shards.

And that’s it! I’ll be spending tonight watching The Nightmare Before Christmas (for the first time!) with plenty of chocolate bark while listening out for the trick or treaters… Happy Halloween everyone!

Three Tier Biscoff Cake

I have heard a lot of people talking about Biscoff lately. I assumed it was an American thing and not for us Brits. Loaded with sugar and not even remotely natural, I was sure Waitrose and co would turn their noses up. How wrong I was. It is everywhere.

Biscoff is a brand of biscuits (for those not in the know) but they aren’t just biscuits. They have the biscuity answer to Nutella. Biscoff spread is delicious – you can spread smooth, biscuity goodness over anything!

If I had to choose my best baking creation, this would be it. My sister and I always stick to cupcakes and cookies, but we decided it was time to be ambitious and attempt a layer cake. It turned out to be quite the monster. But this enormous, biscuit tasting cake is actually pretty easy to make. You can use Biscoff spread with anything (cupcakes, cookies, cheesecake, crumbles…) but I reckon this is a pretty good place to start. We got the recipe here and it worked really well.

img_3718-5

YOU WILL NEED

For the cake

  • 400g butter
  • 400g light brown sugar
  • 400g eggs (roughly 7 large eggs)
  • 400g self-raising flour
  • 2 tsp baking powder
  • 4 tbsp whole milk

For the Biscoff buttercream

  • 250g butter
  • 500g icing sugar
  • 300g Biscoff spread
  • 40-60ml whole milk

For the decoration

  • Crushed Lotus biscuits
  • Whole Lotus biscuits
TO MAKE

Heat the oven to 180C and line three sandwich tins.

Beat together the butter and the sugar. Add the flour, eggs and baking powder and beat until combined. Use the milk to loosen if it gets too thick. Divide between the tins and bake for 25-30 minutes.

For the decoration, beat the butter to loosen it. Add the icing sugar at a slow speed until fully combined. Add the Biscoff spread, then the milk until you have the desired consistency.

When the cakes are cool, pipe on the icing and add crushed biscuits on top. Put the next cake on top and repeat. Add the top layer and decorate as you wish!

Summer Baking: Ice Cream Cone Cupcakes

Is it an ice cream? Is it a cupcake? It’s a celebration that The Great British Bake Off is back. That’s what it is.

Paul Hollywood’s steely stare is back and Mary Berry’s delightful way of saying ‘layers’ (watch out for it). Mel and Sue’s innuendos, union jack bunting, blue plasters and an entire batch of new contestants who will inevitably get teary over tarts. I can’t wait.

Most important of all though, you can’t watch an episode of the Bake Off without some kind of baked treat to hand. When I discovered that Martha from a few series back had teamed up with Waitrose, I was immediately lured in by the recipe cards showing off her incredible baked creations. And believe it or not, they aren’t that impossible to recreate at home. Hallelujah! 

IMG_3024 (3)Picture1

These ice cream cone cupcakes are simply an ice cream cone filled with fluffy vanilla sponge and a dollop of whipped meringue on top, complete with chocolate flake. One word against them – they aren’t that easy to actually eat. Prepare to have meringue on your nose.

YOU WILL NEED:

For the cones

  • 12 flat bottomed ice cream cones
  • 12 squares of dark chocolate
  • 125g butter, softened
  • 125g caster sugar
  • 2 medium eggs
  • 1 tsp vanilla extract
  • 125g self-raising flour
  • 1/2 tsp baking powder
  • 5 tbsp milk

For the icing and topping

  • 120g caster sugar
  • 80g golden syrup
  • 2 large egg whites
  • 1/2 tsp vanilla extract
  • 6 Cadbury flakes, halved
  • Coloured sprinkles

TO MAKE:

Preheat the oven to 180C, gas mark 4.

Place each cone into a muffin tray. Place a square of chocolate in the bottom of each and put in preheated oven for 5 mins.

Beat the butter and the sugar. Add eggs one a time and the vanilla extract. In a separate bowl, combine flour and baking powder. Add to mixture gradually until it is a thick batter. Pour in the milk. Distribute between cones, make sure you don’t overfill them. Bake for 20-25 mins.

For the icing, place sugar, syrup and 2 tbsp water in a pan. Cook on a medium-high heat until it reaches 118C on a sugar thermometer). Beat eggs whites until soft peaks form then, with the mixer on a slow speed, pour in the hot sugar. Increase to high speed and whip until mixture is thick and glossy. Add the vanilla extract.

Using a piping bag, pipe and swirl and decorate with half a flake and sprinkles.

Super Simple Gingersnaps

When it comes to tea dunking, you can’t get much better than a gingersnap.

My sister and I have been making gingersnaps since we were very small. It’s been years since we last attempted them as we are more likely to whip up a batch of cookies now, but this weekend the mood for ginger struck and we pulled out our kiddie cookbook. Sure, the instructions are incredibly basic (it specifics that you need an oven) but the gingersnaps are delicious, and it’s a recipe that kids can join in with.

These are really quick, really easy and absolutely perfect with your Sunday afternoon cup of tea.

3

YOU WILL NEED:

  • 100g butter
  • 100g light brown sugar
  • 100g golden syrup
  • 225g plain flour
  • 1 teaspoon bicarbonate of soda
  • 1 teaspoon of ground ginger

TO MAKE:

Preheat the oven to 160C (fan).

Melt together the butter, sugar and golden syrup. Leave to cool for 5 minutes.

Sift the flour, bicarbonate of soda and ginger into the mixture and combine until it forms a smooth, soft dough.

Take a teaspoon of the mixture and roll into a small ball to form the biscuits, you should make around 25.

Bake for 8-10 minutes until the tops have cracked and are just starting to brown (our oven was too high so the tops didn’t crack..!) Enjoy!

12

Healthy Chocolate and Almond Spiced Cookies

Since working in an office, I have become much more interested in what I’m eating.

I’ve never eaten particularly badly, but I would always eat what I wanted without giving anything a second thought. It turns out that attitude doesn’t cut it in an office. When you’re sat at a desk all day, burning those calories is so much tougher. And therefore, I have entered the wonderful world of healthy snacking (and it really is a whole world of deliciousness).

While I usually make a beeline for WH Smith’s ‘nutritional snacks’ stand, these cookies are one of my first homemade efforts. They aren’t the sugar explosion you expect when you bite into a cookie, but that is part of their charm. You can eat them all day and not feel sick! The banana really sweetens them, and the spices make your entire house smell incredible while they’re in the oven. I followed this recipe – they are so easy to make and turned out really well.

IMG_2075 (2)Picture3

YOU WILL NEED:

  • 2 cups ground almonds
  • 2 heaped tbsp coconut oil
  • 9 small squares dark chocolate
  • 1 1/2 tbsp maple syrup
  • 1 small banana
  • 1 tbsp almond butter
  • 1 tsp cinnamon
  • 1/2 tsp ground ginger, nutmeg, salt and baking powder

TO MAKE:

Preheat the oven to 170C. Mash the banana together with the chocolate.

Heat the coconut oil on a low heat. Add the syrup, spices and salt and stir until combined.

Mix the ground almonds, baking powder and almond butter together with the banana and chocolate. Add the melted ingredients and stir until combined.

On a tray, take a tablespoon amount of mixture and press down to form a cookie. Bake for 10-15 mins and enjoy!

Creme Egg Rocky Road

Today I’ve got a special bonus post for Easter Monday (you lucky things!). There’s more than enough chocolate around at the moment, but this sugary creation is for all those discounted Creme Eggs. Beware though, you need a serious sweet tooth to fully enjoy this!

We followed this recipe (but skipped the faffing with the food colouring) and they turned out really well. They are super simple and quick to make, and only require a couple of hours in the fridge to firm up.

P1030855 (2)

YOU WILL NEED:

  • 150g butter
  • 200g dark chocolate, chopped
  • 200g milk chocolate, chopped
  • 4 tbsps golden syrup
  • 180g mini Creme Eggs
  • 180g mini marshmallows
  • 150g Digestive biscuits, crushed
  • 150g white chocolate, chopped
  • 6 Creme Eggs

TO MAKE:

Melt the butter. Add the milk chocolate, dark chocolate and golden syrup and continue to mix and melt until it’s a thick consistency. Set aside to cool slightly.

Add the mini Creme Eggs, marshmallows and Digestive biscuits. Stir until everything is well coated.

Line a baking tin with baking parchment and press in the mixture firmly. Cut the Creme Eggs in half and place on top.

Melt the white chocolate and drizzle over the top. Leave in the fridge for a couple of hours until firm, cut into chunks and enjoy!

P1030857 (2)P1030859 (2)

Surprise Oreo Cupcakes

Today I’ve got a delicious Sunday treat for you all. My sister and I have always been drawn to Oreo cupcakes when we pass the cake stands in London. There’s just something so satisfying about biscuits in cake form – it’s like two treats for the price of one!

We followed this BBC Good Food recipe and they turned out brilliantly. These cupcakes are essentially wonderfully rich and light chocolate cupcakes, with Oreo frosting and a surprise biscuit at the bottom.

P1030836 (2)

Makes: 15 cupcakes. Baking time: 20-25 minutes. 

YOU WILL NEED

FOR THE CUPCAKES:

  • 200g plain flour
  • 40 g cocoa powder
  • 280g caster sugar
  • 3 tsp baking powder
  • 80g butter
  • 240ml whole milk
  • 2 eggs
  • 1/2 tsp vanilla extract
  • 15 Oreo biscuits

FOR THE FROSTING:

  • 100g butter
  • 200g icing sugar
  • 6 Oreo biscuits

TO MAKE

THE CUPCAKES:

Preheat the oven to 170C/160 fan. Place half an Oreo in each muffin case with the cream facing upwards.

Mix together the flour, sugar, cocoa powder, baking powder and butter until combined. In a jug whisk the milk, eggs and vanilla extract. Gradually add to the mixture and mix until smooth.

Bake for 20-25 minutes.

THE FROSTING:

In a bag, smash up 6 Oreos.

Mix the butter and sugar until you have buttercream. Gently fold in the Oreo crumbs.

When the cakes are cool, ice and enjoy!

P1030846 (2)P1030843 (2)

Homemade Christmas Gingerbread

Follow my blog on Bloglovin’!

Happy Christmas Eve, everyone! This post is, of course, as festive as they come (even though it’s a bit of an embarrassing contrast to my last post about detoxing and wellness). Today I’m going to share with you a homemade Christmas gingerbread recipe, with all the butter, all the sugar and all the treacle.

This is a recipe that my sister and I found after trawling the internet and it’s a pretty good one. Warning, the dough is very oily because of the melted butter, but wait for it to cool before you start cutting your shapes and try not to use too much flour and you’ll be fine. It also makes the entire house smell amazing. Perfect to whip up just before the celebrations begin tomorrow!

P1030503 (2)

Makes: Roughly 20 gingerbread shapes. Baking time: 10-15 minutes.

YOU WILL NEED

  • 75g light brown soft sugar
  • 2tbsp golden syrup
  • 1tbsp black treacle
  • 1tbsp water
  • 1tsp ground cinnamon
  • 1tsp ground ginger
  • 95g block butter
  • 1/2tsp bicarbonate of soda
  • 225g plain flour

TO MAKE

Put the sugar, golden syrup, treacle, water, cinnamon, ginger and butter in a pan and melt over a low heat.

Mix the bicarbonate of soda in as it’s melting.

Sift the flour and add to the mixture, mixing in well.

Leave the mixture to cool and roll it out to 3mm thick. Cut your shapes!

Bake for 10-15 minutes (keep an eye on it).

Leave the gingerbread to cool and ice. We used a simple water icing but do whatever you feel like!

P1030496 (2)P1030495 (2)

Gingerbread Cupcakes with Toffee Frosting

The tree has gone up and everyone is getting into the festive spirit, so it seemed only right to whip up some Christmassy goodies. This time, my sister and I decided to have a go at gingerbread cupcakes with toffee frosting, which is one of Tanya Burr’s recipes and her video can be seen here.

I wouldn’t normally bake from a YouTube video, I much prefer to have a recipe in front of me, but my sister had made them before and persuaded me. These cupcakes are so delicious, and so easy to make! We bumped up the original measurements to make 16 cupcakes.

P1030128 (2)

Makes: 16 cupcakes. Baking time: around 15 minutes. 

YOU WILL NEED

FOR THE CUPCAKES:

  • 200g butter
  • 200g soft brown sugar
  • 200g self-raising flour
  • 1 teaspoon cinnamon
  • 1 teaspoon ginger
  • 4 eggs

FOR THE FROSTING:

  • 200g butter
  • 50g soft brown sugar
  • 2 tablespoons milk
  • 200g icing sugar (plus extra)

TO MAKE

THE CUPCAKES:

Preheat your oven to 180C.

Cream together 200g butter and 200g sugar, then add 200g of self-raising flour and 1 teaspoon each of cinnamon and ginger. Mix together well. Crack in 4 eggs and mix.

Put the mixture into cupcake cases and put in the oven. Bake for around 15 minutes but keep an eye on them. Leave them to cool.

THE FROSTING:

To make the toffee syrup, melt 50g butter and 50g brown sugar over a low heat, then add 2 tablespoons milk. Leave to cool.

Mix together 150g butter and 200g icing sugar. Pour the cooled syrup into the mixture and combine.

The syrup will make the mixture sloppy, so keep adding icing sugar until it is stiff and ready to pipe (this might be quite a lot!).

When the cupcakes are cool, ice and decorate!

P1030135 (2)

Picture11

P1030116 (2)